Azure Mobile Service deployment with Team City part 2. Configure TeamCity NuGet Server
In the previous post I explained how to install TeamCity on Azure and configure it.
In this post I will create a TeamCity configuration which will publish to a NuGet Server hosted in TeamCity.
You can find the source code used by these series of post at https://github.com/ralbu/TeamCityAzure
Common project
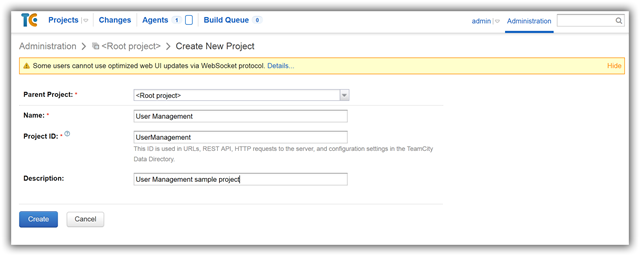
As this is a fresh installation of TeamCity there are no projects. Let’s create one. I will name it User Management. It will contain two configurations:
- Common – a NuGet package used by the main project (User Management)
- User Management – an Azure Mobile Service project
Click the Create project button
Enter the Name of the project and optionally the description and click Create.
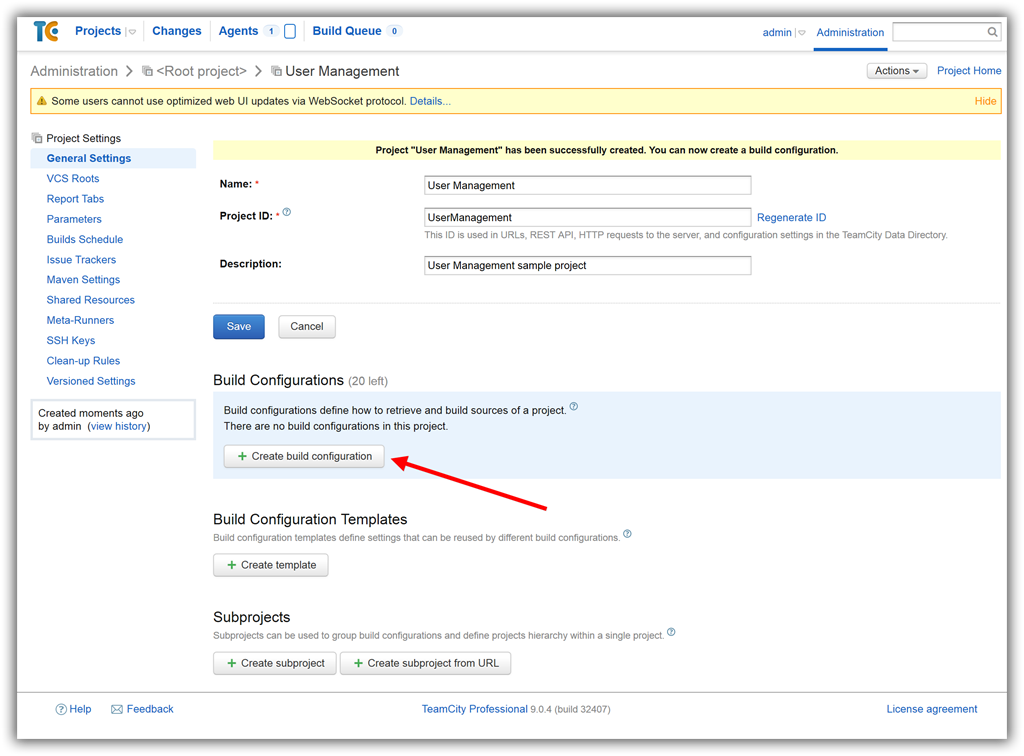
After the project was created click on the Create build configuration button
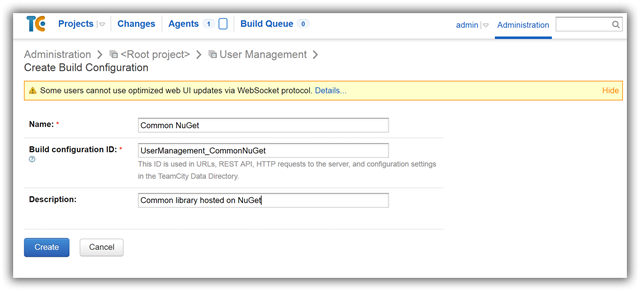
The first project configuration is our Common library hosted on a NuGet server. We’ll use the TeamCity NuGet plugin to host our NuGet Common package.
Enter the required data and click Create.
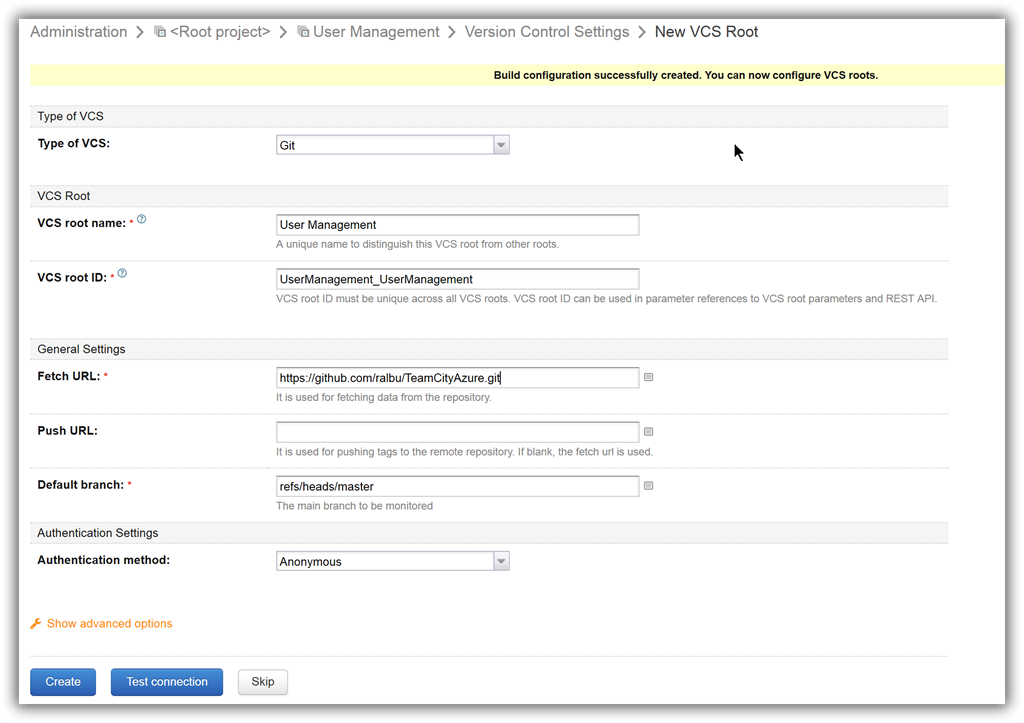
In the next step we configure the source control. For this set of tutorials I host the project to GitHub in a public repository. As this is a public repository I use Anonymous as authentication method. There are other options you can choose from, like Password or Private Key. Click Test Connection and if everything is ok click Create.
Both projects – NuGet package and Azure Mobile Service used in this set of blog posts are under the same GitHub repository so I will reuse this VCS root in both projects.
Prerequisites for running builds
Next we’ll create build configurations but before that we need to install the necessary software and configure NuGet server on TeamCity.
- We are not going to install Visual Studio on the build machine, although that will be easier. We’ll install only the minimum which is needed to build our projects. Remote into the VM and from https://www.visualstudio.com/en-us/downloads download “Microsoft Build Tools” and install it.
- You might also need to install “.NET Framework 4.5.1 Developer Pack”. If you want to have a clean machine I would skip this step and install it later if the build fails. I had to install it because of the xUnit framework. If you are not sure you need “.NET Framework 4.5.1 Developer Pack” then first start with “.NET Framework 4.5” installation.
- In order to deploy our mobile services we’ll be using Web Deploy. Install it from this location: http://www.microsoft.com/en-us/download/details.aspx?id=39277
You’ll need to restart the TeamCity agent. Open the Services application and search for Team City Build Agent and restart it.
We need to manually copy the next two folders
- Copy the folder C:\Program Files (x86)\MSBuild\Microsoft\VisualStudio\v12.0\WebApplications to the same location of TeamCity server. The reason for doing that is because we don’t have Visual Studio installed on the TeamCity machine. The build process uses targets from Microsoft.WebApplication.targets file to build the Web Application.
- Copy the folder C:\Program Files (x86)\MSBuild\Microsoft\VisualStudio\v12.0\Web to TeamCity machine. Make sure you copy this folder. These targets are used in generating packages. If you don’t have this targets it will build the solution but it will not create a package which is used in deployment. It is not easy to figure out if you missed it because the solution will build successfully but the package will not be created and it won’t give you any error or warning.
Configure NuGet Server
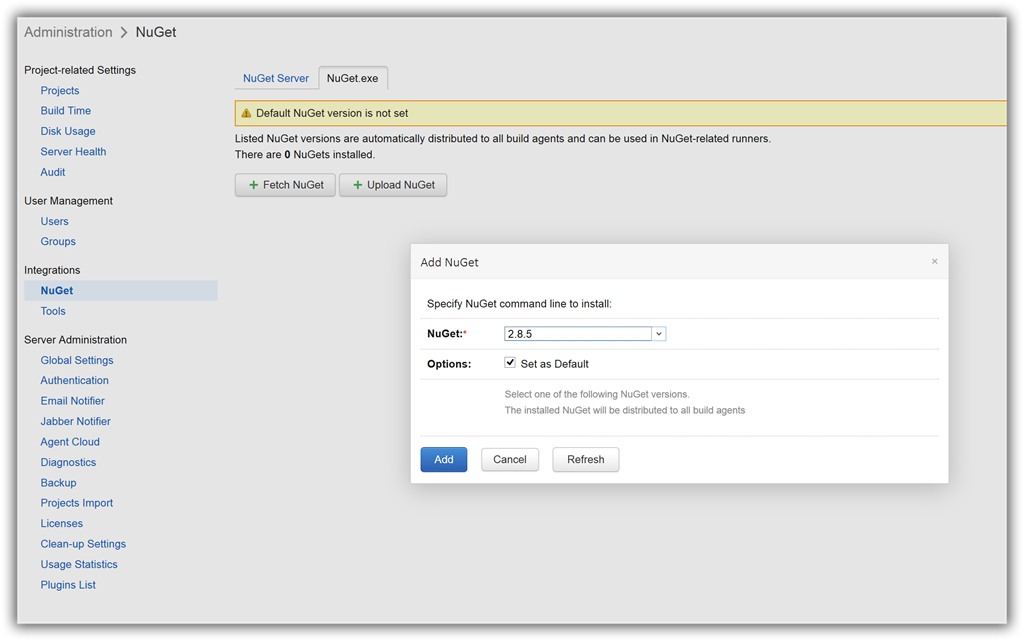
In the TeamCity web page, click on the Administration and then in the left hand side under Integration click NuGet. On the NuGet Server tab click Enable button. We are going to use authenticated feed and not the public one. Copy the link to the authenticated feed URL, we’ll use it later. Click on the NuGet.exe tab and then on Fetch NuGet button. Select the NuGet version and select Set as Default. At the time of this writing the latest NuGet is 2.8.5.
Creating build configurations
In this step we’ll create our first build configuration. As the first step we’ll build our solution.
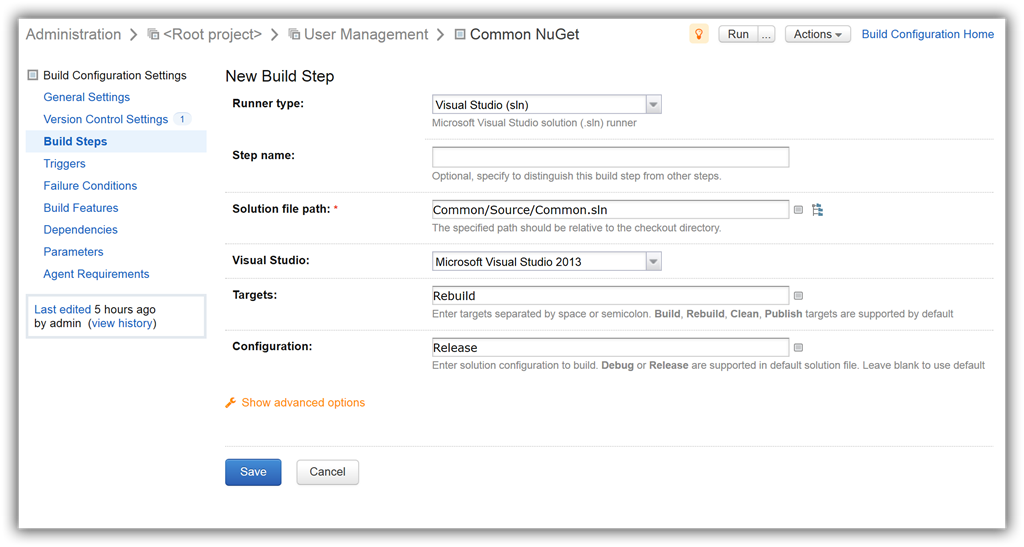
Click on the Build Steps in the Build Configuration Settings and click Add build step
From the New Build Step page select Visual Studio (sln) Runner type and provide the rest of the settings as below and click Save.
Click the Run button if you want to make sure that everything is ok at this step.
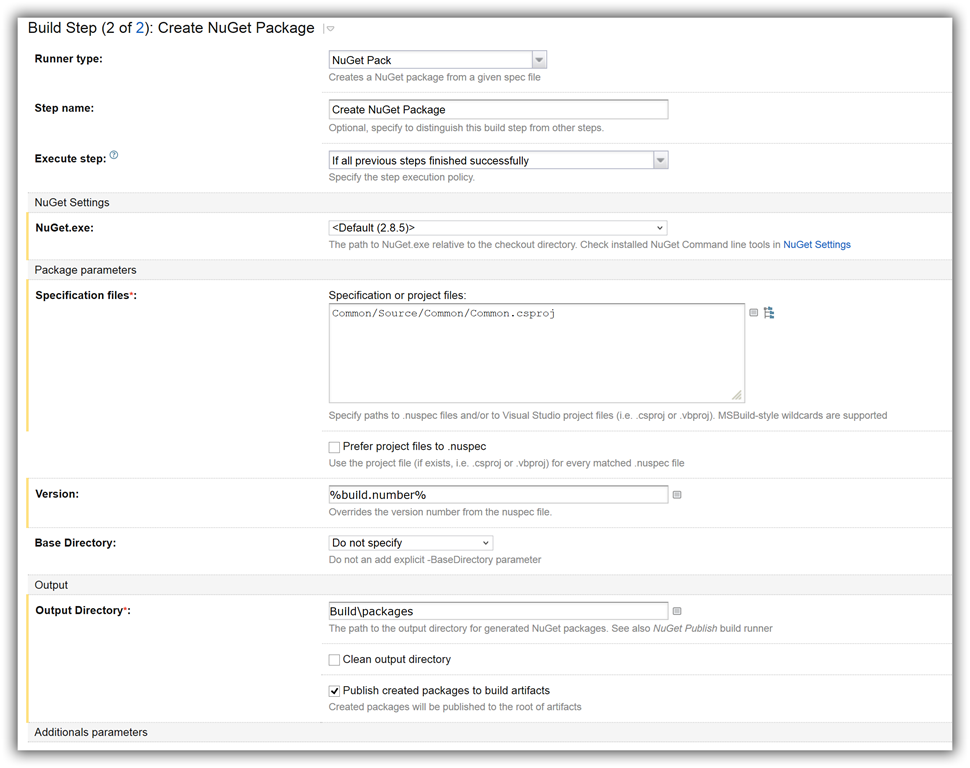
In the next step we’ll add the build configuration to create a NuGet package and publish it on TeamCity’s NuGet server.
First of all make sure you have the NuGet spec file. If you don’t then the fastest way of generating it is to open the command line where your .csproj file is located and run:
nuget spec
Open it and adjust it accordingly.
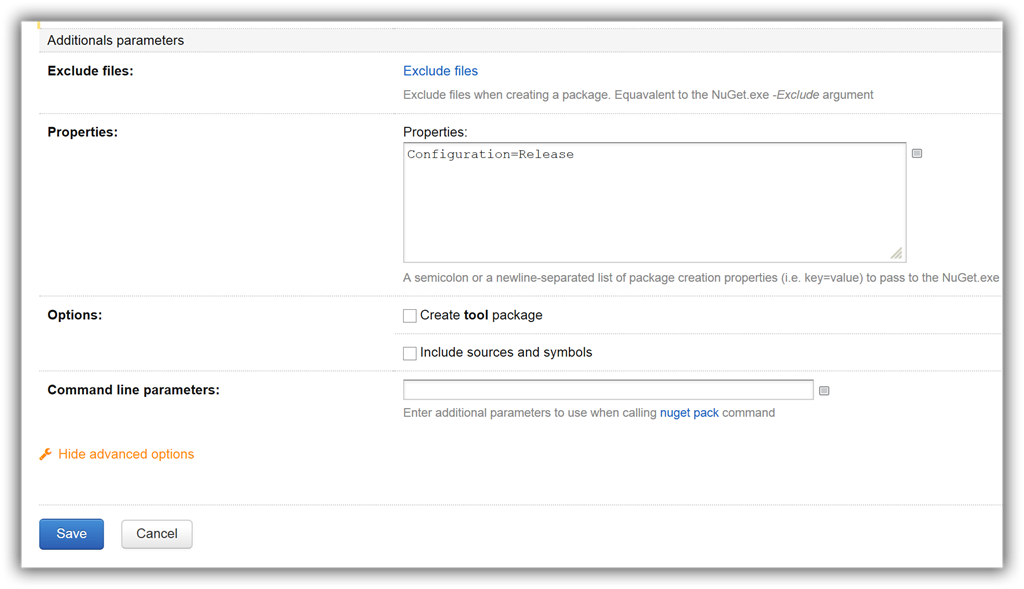
I’m not going to go in details about this step, just have a look at the settings below, and if you want to find out more about it then go to my other blog – Hosting NuGet in TeamCity and consume it in Visual Studio where I explained all the settings.
Click Save and this is how you would configure a NuGet Server. In the next blog post I will describe how to create the main project configuration as a PowerShell script and configure it in TeamCity

