Azure Mobile Service deployment with Team City part 7. Deployment to Test environment
Tags: CI, Powershell, TeamCity
The last step in these series of posts is deploying from TeamCity to a test environment.
We have already created the script which will do the deployment so we need only to create the TeamCity configuration.
Although we can call the script which will do the deployment directly from TeamCity I prefer to have another separate script which at its turn will call the deployment script. In this way we test it locally and if we need to add more functionality we don't have to change the TeamCity configuration. For this purpose we create run-delpoy.ps1 script which will have the same set of parameters as deploy-package.ps1. The script takes input parameters and calls the deploy-package.ps1 script.
Make sure you have created a test Azure Mobile Service instance.
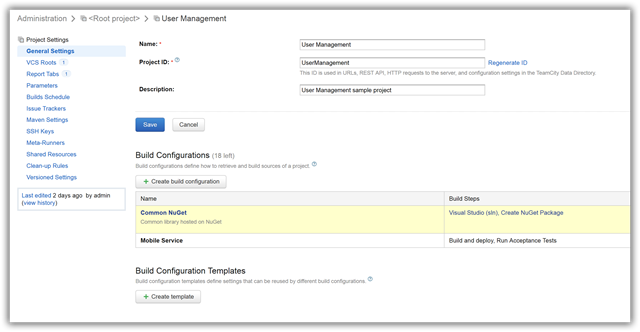
Now let’s configure TeamCity. On the User Management settings page (Administration > User Management) and click Create build configuration.
I will name it Mobile Service Test Deploy and click Create button.
In the next step – Version Control Settings select User Management and click Attach.
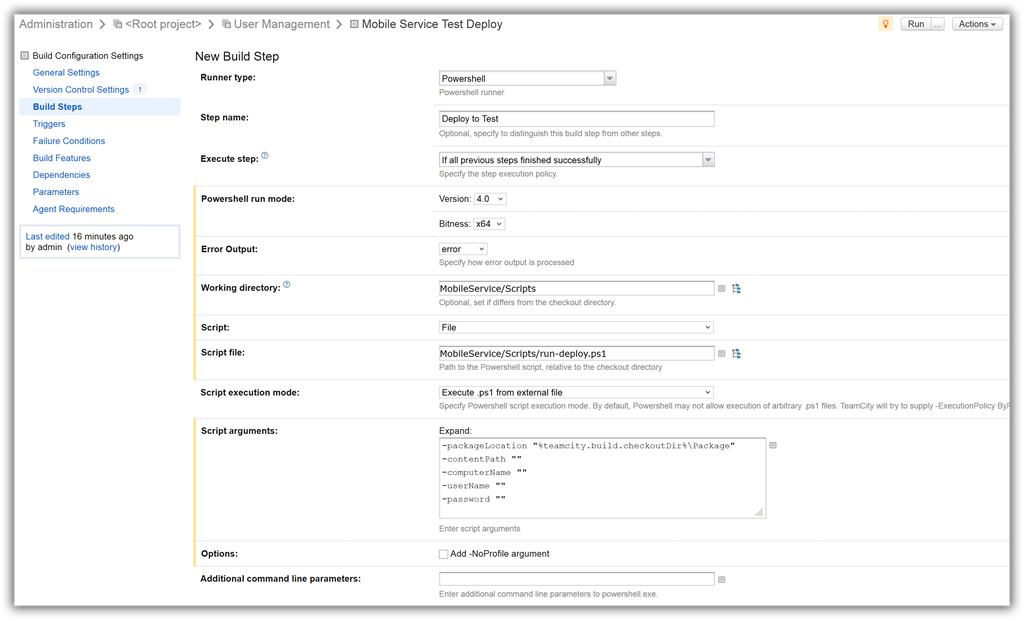
Click on the Build Steps if it didn’t open automatically and click Add build step. Select Powershell from the Runner type drop-down. Give a name to the step and select Powershell mode and error output. Working directory will be MobileService/Scripts and Script file will be MobileService/Scripts/run-deploy.ps1. The last part is adding the Script arguments.
packageLocation parameter indicates where the package is located – it is defined by this value:
"%teamcity.build.checkoutDir%\Package"
This represent the Package folder in the checkout directory. The content of the Package folder will be generated by the Artfact dependency as you’ll see later.
The rest of the parameters value we extract from the Mobile Service publish profile as described in this post.
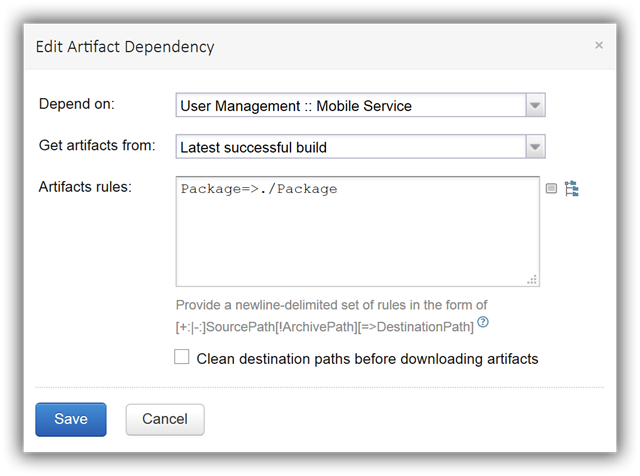
We need to link this build configuration to Mobile Service Team City build configuration we created in previous steps. Open the Dependencies and click on the Add new artifact dependency button. In the Depend on select the Mobile Service, select Last successful build from Get artifacts from and in Artifacts rules enter:
Package=>./Package
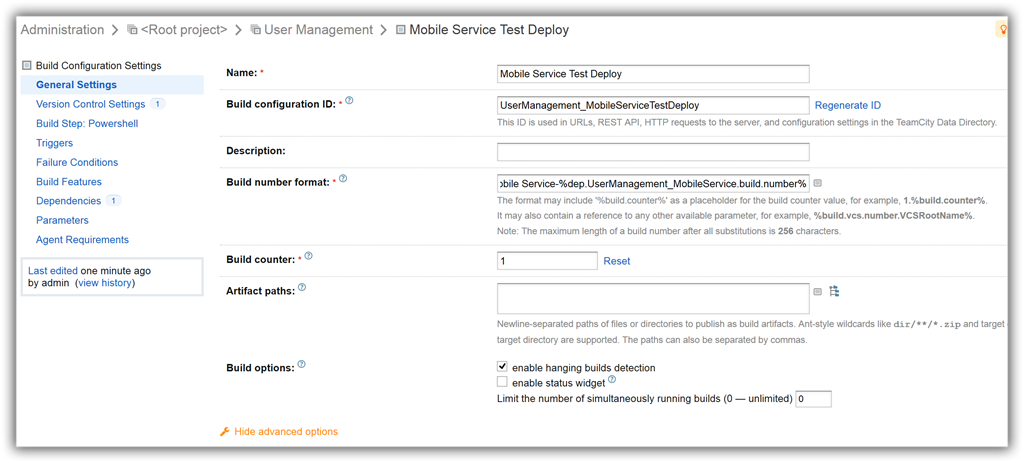
We’re almost done, one last step – we need to know which package was deployed to Test environment. Open the General Settings and in the Build number format enter:
Mobile Service-%dep.UserManagement_MobileService.build.number%
This will tell us which Mobiles service package version was deployed to Test environment.
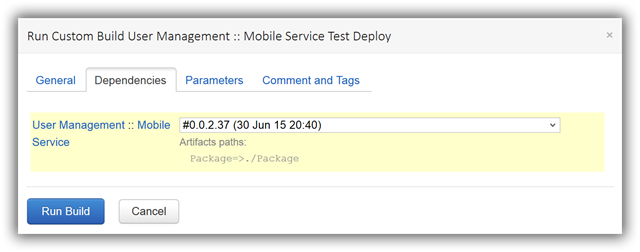
Now we’re ready to run our deployment. On the Project page click on the ellipses Run button of the Deploy project and then click on the Dependencies tab. Select which build you want to deploy and click Run Build
The build run and the package was deployed successfully. As you can see the Test Deploy build indicates which Build package it used to deploy: #Mobile Service-0.0.2.37
Conclusion
With this blog post I’ve finished all the posts about building and deploying an Azure Mobile Service. I’ve started from installing and configuring TeamCity, creating PowerShell scripts to build and deploy up to configuring TeamCity to deploy on Test environment. Although it is concentrated on the Azure Mobile Service you might find some bits of it useful in other type of projects.
I hope you’ll find it useful.
